Building a Blog with PDF Uploader in Rails 5

Goal

Build a blogging feature for use on a nonprofit corporation website. Implement create, read, update, and delete actions for the blog, which will be used to make public announcements with PDFs attached.

edit_upload_blog

Plan

Within an existing Rails 5 app, use the Trix gem and the Paperclip gem along with basic Rails features to build CRUD actions for a blog post.

Instructions

Add gems to the gemfile and run bundle

  1. gem "paperclip","~> 5.0.0"
  2. gem 'trix'

Follow Paperclip install instructions

For Mac OS X, I did:

  1. Install an image processor: brew install imagemagick.
  2. Because I want PDF uploads, I also needed Ghostscript:
    brew install gs

Follow Trix install instructions

  1. In the application stylesheet (a css or scss file in the assets directory), paste
    *= require trix
  2. In the application.js file (also in the assets directory), paste //= require trix

Create relationships and validations in models

I created validations for a post to have a title and content. Paperclip also has a validation for an document’s content type, as well as a required has_attached_file method, where specifications can be added such as the file’s width and height (more likely used for an image than a PDF).
class Post < ApplicationRecord

belongs_to :user
validates :title, presence: true
validates :content, presence: true
has_attached_file :document
validates_attachment_content_type :document, :content_type => ['application/pdf']

end

class User < ApplicationRecord

has_many :posts

end

Migrations

I generated a migration for posts and later ran a Paperclip migration. The Paperclip migration gives a datatype of attachment, which is reflected in the schema after the migration has been run with four new columns: the attachment name, content type, file size, and time of update. (This can also be run as one migration. Check out the Paperclip documentation.)

  1. rails generate migration CreatePosts title:string user_id:integer content:text
  2. rails generate paperclip post document

Routes

I want full CRUD actions for my users and posts, so I used Rails resources.

resources :users
resources :posts

Controller

I haven’t included my entire posts controller, but as an example, here’s the create controller action with strong params. Check out my github repository to see all of my controller actions.

class PostsController < ApplicationController

def create
@post = Post.new(post_params)
@post.user = current_user
# current_user is a method defined in the Application Controller
if @post.save
flash[:notice] = "Post published!"
redirect_to :users
else
flash[:notice] = "posts must have a title and content"
render 'new'
end
end

private

def post_params
params.require(:post).permit(:title, :content, :document)
end

end

Views

To add a Trix text editor in my post new and post edit view, I simply used Trix’s built-in method, which can be used with Rails form_for.

The Paperclip attachment is equally easy to implement with form_for using the file_field method.
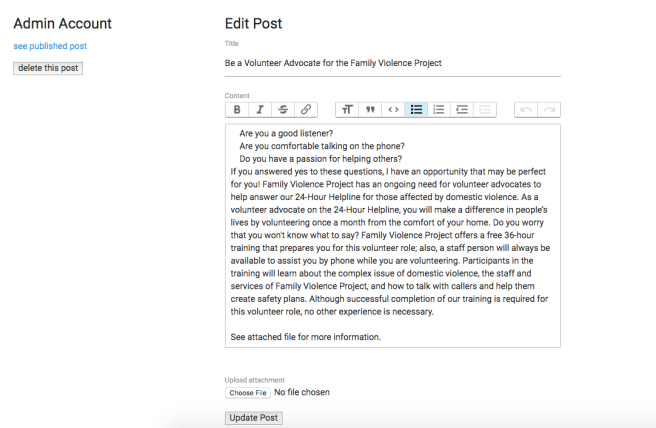
New Post Form

<%= form_for @post do |f| %>
<%= f.label :title %>
<%= f.text_field :title %>

<%= f.label :content %>
<%= f.trix_editor :content %>

<%= f.label :document %>
<%= f.file_field :document %>

<%= f.submit 'submit', :class => "waves-effect waves-light amber lighten-1 white-text btn" %>
<% end %>

Post Show Page

When rendering the post content, I used the Rails sanitize method in order to safely render user input. Sanitize removes any non-whitelisted content from the html.

<%= @post.title %>
<%= link_to @post.upload_attachment_file_name, @post.upload_attachment.url %>
<%= sanitize @post.content %>

Conclusion

While I’ve removed some unnecessary code for simplicity and readability, these steps include everything needed to create a functioning blog feature. Check out my github repository to see the full project.

Resources

Rails Nested Forms: Collection Checkboxes

I recently figured out a couple tricks for using collection check boxes in a Rails 5 project with Materialize styling.

My goal: Have users check or uncheck programs associated with a classroom. A classroom can have many programs, so I used the Rails collection checkboxes form helper to allow multiple selections.

Implementation: The collection checkboxes form helper generates a labelled checkbox for each item in a collection.


<%= f.collection_check_boxes :program_ids, @programs, :id, :title %>

Above, the first argument of collection checkboxes is :program_ids. This represents the method, program_ids, available on each classroom instance. It also will be the name of the key I can access in my params which has the value of all selected program ids.

I passed in @programs as the second argument, which is the collection of programs pulled from my database in my Classrooms controller.

The third argument, :id, refers to the data that will be passed into my params. In this case, I’m going to send the program ids, so that in my Classrooms controller, I can find programs by id in my database.

The final argument, :title, refers to the program’s title, which will be used to label each checkbox so the user will know which program they’re checking or unchecking.

When I added this code to my form, my checkboxes and labels were properly generated, but there was no spacing or formatting. I wanted each program to render on a new line, so I iterated through each program and added divs wrapping the checkbox and label.


<%= f.collection_check_boxes(:program_ids, @programs, :id, :title) do |b| %>
<div> <%= b.check_box %><%= b.label { b.text } %></div>
<% end %>
<% end %>

When I first implemented the iteration, I had reversed the order of the checkbox and label, and my checkboxes were not appearing. I read a handy Stack Overflow post, which explained that the checkbox must appear before the label when using MaterializeCSS.

Next, I used strong params to access my array of checked programs, and update the classroom’s programs in my Classrooms controller’s update method. While I ultimately ended up refactoring my controller, this was my initial approach:


class ClassroomsController < ApplicationController
def update
@classroom = Classroom.find(params[:id])
if @classroom.update(classroom_params)
program_ids = classroom_program_params[:program_ids].delete_if {|program| program == ""}
@programs = program_ids.map {|id| Program.find(id)}
@classroom.update(programs: @programs)
redirect_to users_path, :notice => "#{@classroom.name} updated"
else
flash[:notice] = "Classrooms must have a name"
@programs = Program.all
render :edit
end
end
private
def classroom_program_params
params.require(:classroom).permit({:program_ids => []})
end
def classroom_params
params.require(:classroom).permit(:name, :location, :map_url, :image_url, :description, :longitude, :latitude, :google_address, :phone)
end
end

I used the delete_if method on line five, because the array of ids in my params included empty strings for unchecked boxes.

Refactor: I suspected that there was a more efficient way to update the classroom’s programs from my array of program ids in the Classrooms controller, since my original version involved two iterations and several database calls.

It turns out that I had made the job of updating my associations much more difficult for myself than necessary. In fact, I can simply pass the classroom’s update method my array of program ids, and it’ll take care of the rest:


class ClassroomsController < ApplicationController
def update
@classroom = Classroom.find(params[:id])
if @classroom.update(classroom_params)
redirect_to users_path, :notice => "#{@classroom.name} updated"
else
flash[:notice] = "Classrooms must have a name"
@programs = Program.all
render :edit
end
end
private
def classroom_params
params.require(:classroom).permit(:name, :location, :map_url, :image_url, :description, :longitude, :latitude, :google_address, :phone, {:program_ids => []})
end
end


JS Questions: What is Webpack?

This is the tenth in a series of posts I’m writing that aims to provide concise, understandable answers to JavaScript-related questions, helping me better understand both foundational concepts and the changing landscape of language updates, frameworks, testing tools, etc.

What is Webpack?

JavaScript-based applications have increasingly complex systems and interactions. They send and receive data; they create a user interface; they have non-JavaScript assets such as styling and images; and they incorporate outside packages of reusable code. The purpose of Webpack is to bring together all the disparate parts and turn them into one file, made readable to the browser rendering the application. This job is called module bundling. 

There are two types of ways that code is transformed in Webpack and these processes are handled by separate entities: loaders and plugins.

Loaders take in the application’s files, turn them into modules that can be read by a JavaScript engine, and add the modules to a dependency graph. A dependency graph is like a map (written in JS) showing how each module is related to other modules.

Different loaders can handle different tasks in the transformation process. The babel-loader, for example, takes in ES2015 (or later) code and transpiles the code to an earlier version of JS syntax.

While loaders create modules, plugins alter the modules to optimize them for computer processing, dependency injection, debugging, and other tasks. The UglifyJS plugin, for example, minifies code in order to make it run faster. 

When all dependencies have been added to the graph and all processes have been run, the static file is handed off to the browser to load.

Webpack can be configured with whichever loaders and plugins a project needs, though there’s also an ‘out-of-the-box’ option for React developers. React, a popular library for building JS front end, has community support for Webpack. The package, Create React App, can be used to generate files for a new React application preconfigured with Webpack. The Webpack-enabled functionality, including hot reloading (which adds, removes, or updates modules, without a page needing to fully reload) make it especially handy.

Other module bundlers exist (Browserify is considered the first of its kind), but Webpack has become an industry favorite.


Resources: